Özet
The proper installation of rolling-element bearings is a fundamental determinant of their operational lifespan and the reliability of the machinery in which they are installed. This document provides a comprehensive examination of the methodologies for pressing a bearing, a process that, while seemingly straightforward, is fraught with potential for error that can lead to premature failure. It explores the underlying principles of interference fits, the critical importance of preparation, cleanliness, and the selection of appropriate tools. Five distinct mounting methods are analyzed in depth: mechanical cold mounting using presses and fitting tools, thermal mounting (shrink-fitting) via induction heating, hydraulic mounting for large-scale applications, specialized techniques for tapered bores, and a cautious appraisal of manual methods. The analysis extends to post-installation verification and troubleshooting common installation-induced faults. The objective is to furnish engineers, technicians, and mechanics with a robust theoretical and practical framework for executing this critical task, thereby enhancing machine longevity and performance across diverse industrial contexts, from South American mines to Southeast Asian manufacturing plants.
Önemli Çıkarımlar
- Always press on the ring with the interference fit to avoid damaging the rolling elements.
- Thoroughly clean and inspect the shaft and housing before starting any installation.
- Never use a hammer directly on a bearing; it causes invisible yet catastrophic damage.
- Understanding how to press a bearing correctly is more about precision than force.
- Select the mounting method based on bearing size, type, and available equipment.
- Proper lubrication during assembly is not optional; it prevents scoring and corrosion.
- Verify alignment and smooth rotation immediately after installation to confirm success.
İçindekiler
- Understanding the Foundation: Why Proper Bearing Installation Matters
- The Preparatory Ritual: Setting the Stage for Success
- Method 1: The Mechanical Press (Cold Mounting)
- Method 2: The Thermal Embrace (Hot Mounting or Shrink-Fitting)
- Method 3: The Power of Hydraulics (Oil Injection Mounting)
- Method 4: Mastering the Taper (Mounting on Tapered Seats)
- Method 5: The Manual Approach (A Method of Last Resort)
- The Aftermath: Verification and Initial Run-In
- Frequently Asked Questions (FAQ)
- Sonuç
- Referanslar
Understanding the Foundation: Why Proper Bearing Installation Matters
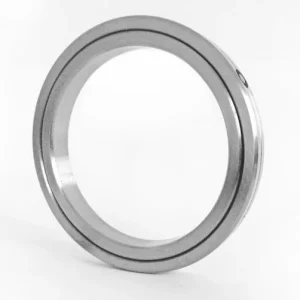
A bearing is not merely a component; it is the very heart of rotational motion in a machine. It carries loads, permits movement, and reduces friction with a precision that borders on the miraculous. Consider the forces at play within a spinning shaft supported by a set of high-quality Roller Bearings. The load is distributed across a series of rolling elements—balls or rollers—each making contact with the raceways over an infinitesimally small area. In this tiny contact zone, the pressures can exceed those found in the deepest oceans. The success of this entire mechanical ballet hinges on a single, foundational event: the moment of installation.
The process of how to press a bearing is an act of creating a precise and intimate union between the bearing rings and their mating components, the shaft and the housing. This union is typically an "interference fit," meaning the bearing ring is slightly larger than the shaft it goes on, or the housing bore is slightly smaller than the bearing's outer diameter. This forces the materials to deform elastically, creating a powerful clamping pressure that prevents the ring from slipping during operation. A slipping ring generates frictional heat, causes rapid wear through a process called fretting corrosion, and ultimately leads to the catastrophic failure of the entire assembly.
To misunderstand this is to invite disaster. An improperly installed bearing is a ticking clock. A blow from a hammer, pressure applied to the wrong ring, a speck of dirt, or a misaligned press can create microscopic dents in the raceways known as "brinelling." When the bearing begins to operate, each rolling element that passes over this tiny dent creates a shock load, generating noise and vibration. This repeated impact fatigues the metal, much like bending a paperclip back and forth, until a crack forms and the bearing disintegrates, often taking the shaft or housing with it. The economic consequences—downtime, collateral damage, and replacement costs—can be staggering. Therefore, the act of pressing a bearing is an exercise in mechanical empathy, a deep understanding of the materials and forces at play, and a commitment to precision that ensures a long and reliable service life.
The Language of Fits and Clearances
Before one can even consider how to press a bearing, one must become fluent in the language of fits and clearances. This is perhaps the most critical preparatory step, as it dictates the entire mounting strategy. The internal clearance of a bearing is the total distance one ring can move relative to the other before it is mounted (SKF, 2024b). This initial clearance is not the clearance the bearing will have when it is running.
When a bearing is mounted with an interference fit on a shaft, the inner ring is stretched, expanding slightly. This expansion consumes some of the bearing's internal clearance. Similarly, if the outer ring is pressed into a tight housing, it is compressed, which also reduces the clearance. Furthermore, as the machine operates, the bearing generates heat. The inner ring, being in direct contact with the rotating shaft, typically gets hotter than the outer ring. This differential thermal expansion causes the inner ring to grow more than the outer ring, further reducing the operational clearance.
Sufficient operational clearance is vital. Too little clearance, a condition known as preload, can cause the rolling elements to be pinched, leading to a rapid spike in friction, temperature, and a swift, dramatic failure. Too much clearance can cause the rolling elements to skid and slide instead of roll, damaging the raceways and leading to noisy, inefficient operation.
Bearing manufacturers like SKF and NSK produce bearings in different clearance classes to account for this. These are designated by suffixes on the bearing number (SKF, 2024a).
| SKF Suffix | ISO Clearance Class | Açıklama | Tipik Uygulama |
|---|---|---|---|
| C2 | Group 2 | Clearance smaller than Normal | Applications requiring high rigidity and rotational accuracy, like machine tool spindles. |
| – (CN) | Normal | The standard range for most general applications. | Electric motors, gearboxes, pumps under normal operating conditions. |
| C3 | Group 3 | Clearance greater than Normal | Used where there are tight interference fits or significant temperature differences, common in electric motors. |
| C4 | Group 4 | Clearance greater than C3 | High-speed applications or those with very tight fits and large temperature gradients, like vibrating screens. |
| C5 | Group 5 | Clearance greater than C4 | Extreme temperature applications, such as hot-rolling mills or paper machine dryer sections. |
Choosing the correct clearance class is a design decision based on the expected fits, operating temperatures, and materials of the shaft and housing. When replacing a bearing, it is paramount to use one with the same clearance class as the original unless the operating conditions have been re-evaluated by an engineer. Attempting to press a C2 bearing where a C3 is required is a recipe for immediate failure.
The Preparatory Ritual: Setting the Stage for Success
The five minutes spent in preparation can save five hours of downtime and five thousand dollars in repairs. This is not an exaggeration. The environment and the components must be prepared with a level of care akin to a surgical theater.
Unpacking and Inspection
A new bearing, whether it is a simple Ball Bearing or a complex Bearing Unit, is a marvel of precision engineering. It arrives from the factory cleaned, lubricated with a preservative, and sealed in protective packaging. Do not unwrap the new bearing until the very last moment before installation. Leaving it exposed on a workbench invites contamination from airborne dust, moisture, and debris.
Once unpacked, perform a gentle visual and tactile inspection. Hold the bearing and rotate it slowly. It should feel smooth, with no grittiness or catching. Look for any signs of corrosion or damage that may have occurred during shipping. Verify that the part number, including all prefixes and suffixes, matches the specification exactly. A suffix like "ECP" on a cylindrical roller bearing, for instance, indicates an optimized internal design with a polymer cage, and substituting it with a different variant could compromise performance (SKF, 2024a).
The Sanctity of Cleanliness
Contamination is the mortal enemy of a rolling bearing. A study by a major bearing manufacturer found that over 16% of premature bearing failures are caused by contamination. The tiny, hardened particles act as an abrasive lapping compound, wearing away the exquisitely finished surfaces of the raceways and rolling elements.
Before you begin, thoroughly clean the shaft and the housing bore. Use a lint-free cloth and a suitable solvent to remove all old lubricant, dirt, rust, and debris. Never use cotton waste or fluffy rags, as they can leave behind fibers that will contaminate the new bearing.
Measurement and Assessment
With the components clean, a critical inspection must take place. Use a micrometer to measure the shaft diameter at several points along the bearing seat, and a bore gauge to measure the housing. Check for out-of-roundness (ovality) and taper. The surfaces should be cylindrical and within the tolerances specified by the machine's designer or the bearing manufacturer.
Run your finger—or better yet, a dial indicator—along the bearing seats to feel for any burrs, nicks, or scoring. A raised burr will prevent the bearing from seating correctly and will create a high-stress point. These must be carefully removed with a fine file or abrasive stone, followed by a final cleaning. Check the shaft shoulder and housing shoulder to ensure they are square to the centerline. A bearing pressed against an out-of-square shoulder will be tilted, leading to severe misalignment and immediate problems.
Gathering the Correct Tools
Assembling the right toolkit is a non-negotiable part of the preparation. The specific tools will depend on the chosen method, but the principle is universal: never use a tool that applies uncontrolled impact or point loads.
| Mounting Method | Best For | Avantajlar | Disadvantages | Key Tools |
|---|---|---|---|---|
| Mechanical Press | Small to medium bearings (up to ~100 mm bore) | Controlled force application; good for production environments. | Risk of misalignment if not set up carefully; can be slow. | Hydraulic/Arbor Press, Bearing Fitting Tool Kit (sleeves & impact rings), Feeler Gauges. |
| Thermal (Hot) Mount | Medium to large bearings; interference fits | No pressing force required, reducing risk of damage; fast. | Requires temperature control; safety risks (burns); potential for metallurgical changes if overheated. | Induction Heater, Bearing Oven, Thermometer/Infrared Gun, Heat-resistant Gloves. |
| Hydraulic Mount | Large bearings (>150 mm bore); tapered seats | Extremely high mounting forces with precise control; reduces physical effort. | Requires specialized, expensive equipment; risk of oil injection injury. | Hydraulic Pump, Hydraulic Nut, Pressure Gauge, Dial Indicators. |
Having these tools ready, clean, and in good working order prevents the temptation to improvise with destructive alternatives like a hammer and a punch.
Method 1: The Mechanical Press (Cold Mounting)
This is the classic and most widely used technique for installing small and medium-sized bearings at ambient temperature. The core principle is to use a controlled, steady force to overcome the interference fit.
The Guiding Principle: Press on the Correct Ring
Imagine the bearing as a delicate assembly. The rolling elements are sandwiched between the inner and outer rings. If you need to press the bearing onto a shaft (the most common scenario), the interference fit is between the shaft and the inner ring. Therefore, all pressing force must be applied exclusively to the face of the-inner ring.
What happens if you press on the outer ring to force the bearing onto a shaft? The mounting force will be transmitted from the outer ring, through the rolling elements, to the inner ring. The immense pressure concentrated on the tiny contact points between the rollers/balls and the raceways will permanently deform the surfaces, creating the brinelling damage we discussed earlier. The bearing is damaged before it has even turned once.
The rule is simple and absolute:
- Mounting on a shaft? Press the inner ring.
- Mounting in a housing? Press the outer ring.
- Mounting on a shaft and in a housing simultaneously? Press both rings at the same time using a tool that contacts both faces equally.
Using a Hydraulic or Arbor Press
A press is the ideal tool for cold mounting as it provides a slow, steady, and controllable force.
Step-by-Step Procedure
- Preparation: Ensure the press bed is clean and level. Gather your support blocks, the new bearing, and a suitable pressing sleeve or piece. Lightly oil the shaft's bearing seat and the bearing's bore with a thin film of light machine oil or a specialized mounting fluid. This lubricant is not for operation; it is to reduce the force needed for mounting and prevent scoring and fretting corrosion.
- Positioning: Place the shaft vertically on the press bed, supported by blocks if necessary. Carefully place the new bearing onto the shaft, ensuring it is perfectly square to the shaft's centerline. A tilted bearing will jam and score the shaft.
- Selecting the Sleeve: The most critical part of the setup is the pressing tool that will contact the bearing. Use a bearing fitting tool kit, which contains a series of hardened, precision-machined aluminum or steel rings. Select a ring that has an inner diameter just larger than the shaft and an outer diameter just smaller than the inner ring's raceway shoulder. It must only contact the face of the inner ring. Never use a socket from a wrench set; they are not designed for this, are often not perfectly flat, and can shatter under pressure.
- Alignment: Place the selected fitting ring on the face of the inner ring. Bring the press ram down so it is centered on the fitting ring. Double-check that the entire assembly—shaft, bearing, and ring—is perfectly vertical and aligned under the ram.
- Pressing: Begin to apply pressure slowly and smoothly. Watch the pressure gauge and observe the bearing's movement. It should slide on steadily. If the force required suddenly spikes, or if you hear any cracking or popping sounds, stop immediately. A sudden increase in force often means the bearing has become misaligned and is jamming. Retract the press, remove the bearing (which may now be damaged), and re-inspect everything before trying again with a new bearing.
- Final Seating: Continue pressing until the bearing's side face is firmly and squarely seated against the shaft shoulder. You will feel a distinct increase in resistance when it makes contact. Do not apply excessive force at this point.
- Verification: Retract the press and remove the assembly. Visually inspect the joint between the bearing and the shoulder to ensure there are no gaps. Rotate the outer ring by hand. It should spin freely and smoothly. If it feels tight, rough, or notchy, the bearing was likely damaged during installation.
Method 2: The Thermal Embrace (Hot Mounting or Shrink-Fitting)
For medium and large bearings, or for any bearing with a significant interference fit, the force required for cold pressing can become dangerously high. A more elegant solution is to use the power of thermal expansion. Steel, like most materials, expands when heated. By heating the bearing, we can make its bore expand just enough to slide effortlessly over the shaft without any force at all. As it cools, it shrinks and grips the shaft with the precise, predetermined pressure of the interference fit.
The Physics of Expansion
The change in a bearing's diameter can be calculated, but a good rule of thumb is that for every 100°C (180°F) increase in temperature, a steel bearing's bore will expand by approximately 0.1%. For a 100 mm shaft with a 0.025 mm interference fit, heating the bearing by just 80-90°C above the shaft's temperature is usually sufficient to provide the clearance needed for mounting.
The critical rule of hot mounting is temperature control. Standard bearing steel should never be heated above 125°C (257°F). Exceeding this temperature can cause permanent metallurgical changes, altering the steel's hardness and dimensional stability, effectively ruining the bearing.
Safe Heating Methods
The method used to heat the bearing is of paramount importance.
- Induction Heaters: This is the gold standard. An induction heater works like a transformer, where the heater is the primary coil and the bearing becomes a single-turn secondary coil. An alternating magnetic field induces powerful electric currents within the bearing ring, causing it to heat up rapidly, evenly, and cleanly from the inside out. Modern induction heaters have built-in temperature probes and automatic demagnetizing cycles, making them incredibly safe and efficient. The outer ring and cage remain relatively cool, making handling easier.
- Bearing Ovens: Thermostatically controlled ovens are also a good option, especially for batch-heating multiple small bearings. They provide even, controlled heat.
- Oil Baths: This is an older method that is falling out of favor due to safety and cleanliness concerns. It involves heating the bearing in a tank of clean oil. The risks are significant: hot oil is a fire and burn hazard, the bearing can be contaminated by dirty oil or particles at the bottom of the tank, and disposal of the used oil is an environmental concern.
- Never Use a Torch: Directing an open flame from a cutting or welding torch onto a bearing is an act of mechanical barbarism. It causes extreme, localized overheating, leading to hard and soft spots, warping, and almost certain failure.
Step-by-Step Hot Mounting Procedure
- Preparation: Prepare the shaft and workspace as you would for cold mounting. Ensure all tools, including clean, dry, heat-resistant gloves, are within easy reach.
- Heating: Place the bearing on the induction heater's yoke or in the oven. Set the target temperature, typically between 110°C and 120°C (230°F and 248°F). Do not rush this process.
- The Final Approach: Once the bearing reaches temperature, the clock is ticking. You have a limited window before it cools and starts to shrink. Working quickly but safely, don your heat-resistant gloves.
- Mounting: Remove the hot bearing from the heater. Swiftly carry it to the prepared shaft. With one smooth, continuous motion, slide the bearing onto its seat until it makes firm contact with the shaft shoulder. The movement should be frictionless.
- Holding and Cooling: Hold the bearing firmly against the shoulder as it begins to cool and grip the shaft. If not held, it can sometimes "walk" back slightly as it cools. For larger bearings, a holding tool or nut may be necessary. Allow the bearing to cool naturally in still air. Do not try to accelerate cooling with water or compressed air, as this can cause thermal shock and create stress cracks.
- Verification: Once the bearing has cooled completely to ambient temperature, perform the same checks as for cold mounting. Verify it is seated against the shoulder and that the outer ring rotates smoothly.
Method 3: The Power of Hydraulics (Oil Injection Mounting)
When dealing with very large bearings, typically with bore diameters exceeding 150-200 mm, both mechanical and thermal methods become impractical. The forces are too great, and the bearings are too massive to handle safely when hot. This is the domain of hydraulic mounting.
The technique, often called the SKF oil injection method, is ingenious. It uses high-pressure oil to "float" the bearing onto its seat. A series of small ducts are machined into the shaft, leading to a distribution groove on the bearing seat. A hydraulic pump is connected to these ducts, and oil is injected between the bearing and the shaft at extremely high pressure (often over 10,000 psi). This thin film of oil expands the bearing's inner ring and overcomes the interference fit, allowing the bearing to be pushed into place with relatively little force, often provided by a hydraulic nut.
Key Components and Principles
- Hydraulic Pump: A specialized hand or air-powered pump capable of generating the required high pressures.
- Hydraulic Nut: A device that temporarily threads onto the shaft. It contains an annular piston that, when pressurized, pushes against the bearing's inner ring to drive it up the shaft.
- Pressure Gauge: Essential for monitoring both the oil injection pressure and the hydraulic nut pressure.
- Tapered Seats: While possible on cylindrical seats, this method is most commonly used on tapered bearing seats. The taper allows for a precise adjustment of the final fit by controlling how far the bearing is driven up the taper.
Step-by-Step Hydraulic Mounting (on a Tapered Seat)
- Preparation: The level of cleanliness required is extreme. Any dirt in the oil ducts will block them. Clean the shaft, bearing, and all hydraulic fittings meticulously.
- Initial Positioning: Lightly oil the shaft and slide the bearing onto the tapered seat until it makes firm contact. The heavy interference has not yet been engaged.
- Setup: Thread the hydraulic nut onto the shaft until it contacts the bearing's inner ring. Connect the hydraulic pump to the nut's pressure fitting. Connect a separate pump to the shaft's oil injection port.
- Oil Injection: Begin pumping oil into the oil injection port. Watch the pressure gauge. As the pressure builds, the oil will force its way between the bearing and the shaft, creating a separating film. You will see a sharp drop in pressure once the bearing "pops" free and is floating on the oil film. Maintain this pressure.
- Axial Drive-Up: With the bearing floating, begin to pressurize the hydraulic nut. The nut will smoothly push the bearing up the taper. The distance it is pushed, known as the "axial drive-up," determines the final interference fit and the reduction of internal clearance. This distance is a precise value calculated by the bearing manufacturer or machine designer.
- Monitoring: Use a dial indicator to measure the axial drive-up accurately. Alternatively, use feeler gauges to measure the reduction in the bearing's internal clearance directly. This is the most accurate method. For a Spherical Roller Bearing, for example, you would measure the clearance before mounting, and then continue driving the bearing up the taper until the clearance has been reduced by a specified amount.
- Releasing Pressure: Once the correct axial position or clearance reduction is achieved, release the pressure to the hydraulic nut first. Then, release the pressure to the oil injection port. The oil film will collapse, and the bearing will grip the shaft with immense force.
- Final Steps: Remove the hydraulic equipment. Check the final clearance one last time to ensure it is within the specified range.
Method 4: Mastering the Taper (Mounting on Tapered Seats)
Many bearings, particularly Spherical Roller Bearings and some Cylindrical Roller Bearings, are designed with a tapered bore. They are not mounted directly on a cylindrical shaft but on a tapered seat, which can be an integral part of the shaft or a separate adapter sleeve or withdrawal sleeve. The primary advantage of a tapered mounting is that the final interference fit and operating clearance can be precisely adjusted.
The fit is controlled by how far the bearing is pushed up the taper. As it moves up the slope, its inner ring is expanded, reducing the internal clearance. The mounting process is therefore a measurement process.
The Two Methods of Measurement
- Axial Drive-Up: This involves measuring the axial distance the bearing travels from its starting position to its final position on the taper. Manufacturers provide charts that correlate this distance to a specific clearance reduction for a given bearing. While simple, it is less accurate because it can be affected by friction and the condition of the surfaces.
- Clearance Reduction: This is the most reliable method. It involves directly measuring the bearing's internal clearance with a feeler gauge before and during the mounting process.
Step-by-Step Mounting Using Clearance Reduction
- Initial Measurement: Before mounting, place the bearing on a clean surface and measure its initial radial internal clearance. Using a long, thin feeler gauge, measure the gap between the topmost roller and the outer ring. You must push the inner ring down and the outer ring up to collect all the clearance at the top. Find the thickest blade that fits, and then the next size up that does not. The true clearance is between these two values.
- Preparation: Thoroughly clean and lightly oil the tapered seat and the bearing bore. If using an adapter sleeve, slide it onto the shaft to its approximate location.
- Positioning: Slide the bearing onto the tapered seat until it makes light contact.
- Drive-Up: Using a spanner wrench for smaller bearings or a hydraulic nut for larger ones, begin to drive the bearing up the taper.
- Periodic Measurement: Drive the bearing a small amount, then stop and re-measure the internal clearance. The shaft must be rotated to ensure the rollers are properly seated before each measurement.
- Target Clearance: Continue this process of driving and measuring until the clearance has been reduced by the amount specified in the bearing's technical data sheet. For example, a 22220 E C3 bearing might have an initial clearance of 0.100-0.125 mm and require a final mounted clearance of 0.060-0.080 mm. You would therefore drive it up the taper until the initial clearance is reduced by approximately 0.040-0.045 mm.
- Locking: Once the correct clearance is achieved, the bearing is secured in place. If using an adapter sleeve, this is done by tightening a locknut and bending a tab on the lock washer into one of the nut's slots.
This method requires patience and care, but it is the only way to guarantee the correct operational setup for a bearing on a tapered seat.
Method 5: The Manual Approach (A Method of Last Resort)
In an ideal world, one would always have access to a press or an induction heater. In the real world, particularly in field repairs or less-equipped workshops, sometimes the only tools available are a hammer and a piece of pipe. While heavily discouraged by all bearing manufacturers, if this method must be used for small bearings (typically under 50 mm bore), it must be done with an understanding of the immense risks.
The goal is to convert the sharp, high-impact force of a hammer into a more distributed, even pressure on the correct bearing ring.
The Correct (and Least Damaging) Technique
- Select a Sleeve: Find a piece of thick-walled pipe or a tube with a perfectly flat, square end. As with the press method, its inner diameter must be larger than the shaft, and its outer diameter must be small enough to only contact the face of the inner ring. The pipe must be long enough to clear the end of the shaft.
- Preparation: Clean and lightly oil the shaft and bearing bore. Place the bearing squarely on the shaft.
- Positioning the Sleeve: Place the flat end of the pipe squarely on the face of the inner ring.
- Tapping, Not Bashing: Use a hammer to deliver a series of light, controlled taps to the end of the pipe. Work your way around the end of the pipe in a star pattern, much like tightening the lug nuts on a car wheel. This helps to drive the bearing on evenly and prevents it from tilting.
- Listen and Feel: Pay close attention to the sound and feel. The sound should be a solid, dull thud. A sharp, ringing sound indicates you are hitting too hard. If the bearing starts to tilt or jam, stop immediately.
- Seating: Continue this process until you hear a distinct change in the sound, indicating the bearing is fully seated against the shaft shoulder.
This method is inherently dangerous to the bearing. The shockwaves from the hammer blows can still cause brinelling, and it is very difficult to prevent the bearing from tilting. It should only ever be considered for small, non-critical applications when no other option exists. The knowledge of how to press a bearing properly often means knowing when not to use a hammer.
The Aftermath: Verification and Initial Run-In
The job is not finished when the bearing is seated. A few final checks are essential to confirm a successful installation.
- Rotational Check: Rotate the shaft or the bearing's outer ring by hand. It should feel smooth and consistent throughout its rotation. Any roughness, notchiness, or tight spots are a sign of trouble.
- Lubrication: If the bearing is not a pre-lubricated sealed or shielded type, now is the time to apply the correct operational lubricant. Follow the machine manufacturer's recommendations for the type and quantity of grease or oil. Do not over-lubricate, as this can cause the bearing to overheat.
- Initial Run-In: Start the machine and let it run for a short period, ideally with no load. Listen carefully for any unusual noises like humming, squealing, or rumbling. Use a bearing thermometer or an infrared temperature gun to monitor the bearing housing's temperature. It is normal for the temperature to rise initially as the lubricant distributes itself, but it should stabilize after 30-60 minutes. A continuously rising temperature is a critical warning sign that something is wrong—shut down the machine and investigate immediately.
By diligently following these steps, from preparation to verification, you transform the task of how to press a bearing from a risky gamble into a precise and repeatable engineering procedure, ensuring the health and longevity of your machinery.
Frequently Asked Questions (FAQ)
What happens if you press a bearing on the wrong ring?
Pressing on the wrong ring (e.g., the outer ring when mounting on a shaft) transmits the entire mounting force directly through the rolling elements. This creates immense point-loading on the delicate raceways, causing microscopic dents called brinelling. The bearing is permanently damaged before it even begins operation, leading to noise, vibration, and a drastically shortened service life.
Can I reuse a bearing after removing it?
Generally, it is not recommended, especially for small to medium-sized bearings. The force required to dismount a bearing with an interference fit often causes damage, even if it is not visible. If a large, expensive bearing must be reused, it should be dismounted using proper pullers or hydraulic methods, then meticulously cleaned and inspected by an expert for any signs of damage before being considered for re-installation.
How tight should a press-fit bearing be?
The "tightness" is determined by the interference fit, which is a specific dimensional difference chosen by the machine's designer. It is not a matter of feel. The fit is based on the load, speed, and materials involved. The correct approach is to ensure the shaft and housing dimensions are within the specified tolerances and to use the bearing with the correct internal clearance class (e.g., CN, C3) to achieve the desired operational clearance after mounting.
What is the best lubricant for pressing a bearing?
For cold mounting, a thin film of light machine oil or a specialized anti-fretting paste or mounting fluid should be applied to the shaft seat and bearing bore. This is not for operational lubrication but to reduce the required mounting force, prevent scoring of the surfaces, and inhibit fretting corrosion. Do not use heavy grease, as it can trap contaminants and make seating difficult.
Why did my new bearing fail so quickly?
Premature failure of a new bearing is almost always due to an installation error. The most common causes are contamination (dirt entering the bearing), improper mounting technique (brinelling from hammer blows or pressing on the wrong ring), misalignment (bearing not seated squarely), or using a bearing with the incorrect internal clearance for the application's fits and temperatures.
How do I know what temperature to heat a bearing to for hot mounting?
A general rule is to heat the bearing to about 80-90°C (144-162°F) above the shaft's temperature. However, you must never exceed the manufacturer's maximum recommended temperature, which for standard bearings is typically 125°C (257°F). An induction heater with a temperature probe is the best tool to ensure accurate and safe heating.
Is it necessary to lubricate the shaft before pressing a bearing?
Yes, it is a critical step. A light film of oil or mounting paste reduces the friction between the bearing bore and the shaft seat. This lowers the amount of force needed to press the bearing on, which reduces the risk of scoring the shaft or damaging the bearing during the process. It also helps to prevent fretting corrosion from developing between the two surfaces during operation.
Sonuç
The act of pressing a bearing is a confluence of science, art, and disciplined practice. It demands more than just physical force; it requires an intellectual engagement with the principles of fits, clearances, thermal dynamics, and material properties. We have journeyed from the foundational importance of a correct fit to the meticulous rituals of preparation, where cleanliness and measurement reign supreme. We have explored the controlled elegance of the mechanical press, the transformative power of the thermal embrace, and the immense, precise force of hydraulics. Even the fraught, last-resort manual method was examined not as a recommendation, but as a study in harm reduction.
Ultimately, the longevity of a bearing is written in the first moments of its life. A successful installation is quiet, smooth, and precise. It is an act of mechanical foresight, where careful preparation and the selection of the correct technique prevent a future of noise, vibration, and costly failure. By internalizing these methods and principles, technicians and engineers across the globe can elevate a routine task into a cornerstone of machine reliability, ensuring that these critical components fulfill their long and productive purpose.
Referanslar
NSK. (2025). Bearing basics (uses, types, and components). Retrieved from https://www.nsk.com/tools-resources/abc-bearings/bearing-basics
NSK. (2025). 1.2—Rolling elements. Retrieved from https://nsk.com/tools-resources/abc-bearings/rolling-elements
Schaeffler Group. (2025). Cylindrical roller bearings. Schaeffler in China. Retrieved from
SKF. (2024a). Designation system. Retrieved from
SKF. (2024b). Internal clearance. Retrieved from
SKF. (2024c). Components and materials. Retrieved from
SKF. (2024d). Cylindrical roller bearings. Retrieved from